I want to share the podcast ‘Open Tech Talks: Technology Worth Talking | Artificial Intelligence | Tools & Tips.’
It’s good to be recognized as one of the Top 100 Artificial Intelligence Podcasts on the web by FeedSpot
Thank you to all the listeners and guests for making it possible.

Let’s keep it every week to bring something new insight on the field of Generative AI that can help all of us to apply in the businesses or daily life
It also featured podcast in Top 60 IT Podcast, Top 10 Middle East Technology Podcasts and Top 3 Middle East AI Podcasts list.
Thank You
Kashif
The error message ModuleNotFoundError: No module named 'google' suggests that the required Google Protocol Buffers (protobuf) package is not installed or not correctly set up in your Python environment. This package is essential for Streamlit as it uses protobufs to manage communication between the front and back end.
Here’s how to resolve this issue:
Step 1: Install Google Protocol Buffers
First, you need to install the protobuf package. Since you are using Anaconda, it’s best to use the Conda package manager, which handles dependencies more smoothly within Conda environments.
Using Conda:
conda install -c anaconda protobufUsing pip: If for some reason you prefer or need to use pip:
bashCopy codepip install protobuf
Step 2: Verify the Installation
After installing, you can verify that the protobuf library is installed by trying to import it:
bashCopy codepython -c "import google.protobuf"
If this command does not throw an error, the library is installed correctly.
Step 3: Retry Running Streamlit
Once the protobuf library is installed, try running your Streamlit application again:
bashCopy codestreamlit run quickstart.py
Step 4: Check for Other Missing Dependencies
If you encounter further ModuleNotFoundError issues, it might indicate other missing dependencies. Install each as required using Conda or pip, similar to how you installed protobuf.
Step 5: Use a Virtual Environment (Optional)
If these problems persist, consider setting up a new Python virtual environment specifically for your project to avoid conflicts with other packages in your main Anaconda environment:
bashCopy codeconda create -n newenv python=3.9  # Create a new environment
conda activate newenv  # Activate the new environment
conda install -c anaconda protobuf streamlit  # Install necessary packages
streamlit run quickstart.py  # Run your Streamlit app
Step 6: Ensure Correct Python Path
Ensure that when you run the Streamlit command, it is being executed in the correct Python environment where all necessary packages are installed. Sometimes, scripts might be executed with a different interpreter unintentionally. You can specify the Python interpreter directly:
bashCopy code/path/to/env/bin/streamlit run quickstart.py
Replace /path/to/env/bin/streamlit with the actual path to the Streamlit executable in your environment.
By following these steps, you should be able to resolve the ModuleNotFoundError and successfully run your Streamlit application.
Paste that in a macOS Terminal. This script will explain what it will do, and you can read it carefully.
/bin/bash -c "$(curl -fsSL https://raw.githubusercontent.com/Homebrew/install/HEAD/install.sh)"
Append Homebrew to your .zprofile:
This command adds the initialization script for Homebrew to the .zprofile, which is executed whenever a new shell session starts on your macOS. This ensures that Homebrew’s environment settings are initialized with every new terminal session.
echo 'eval "$(/opt/homebrew/bin/brew shellenv)"' >> /Users/kashifmanzoor/.zprofile
Execute the Homebrew environment script:
This command immediately initializes the Homebrew environment in your current terminal session without needing to restart the terminal. This allows you to use Homebrew right away.bashCopy codeeval "$(/opt/homebrew/bin/brew shellenv)"
eval "$(/opt/homebrew/bin/brew shellenv)"
Run these commands separately in your terminal to properly configure Homebrew.
Install the Oracle Cloud Infrastructure CLI
Follow these steps to install the Oracle Cloud Infrastructure (OCI) CLI on macOS. The CLI lets you interact with Oracle Cloud resources and services through your terminal. With Homebrew installed, you can now proceed to install the OCI CLI using Homebrew by running the following command:
brew install oci-cli
Verify Installation
Once the installation is complete, verify that the CLI is installed correctly by checking the version. This command also ensures that the CLI is operational:
oci --version
Configuration Setup
oci setup config
Create API Signing Key if Missing
If the file truly doesn’t exist because it hasn’t been created yet, you’ll need to generate a new API Signing key pair. Here’s how you can do it:
- Generate the key pair:
openssl genrsa -out /Users/name/ocikey.pem 2048
Generate the public key from the private key:
openssl rsa -pubout -in /Users/name/ocikey.pem -out /Users/name/ocikey_public.pem
Set the correct permissions for the private key:
chmod 600 /Users/name/ocikey.pem
Test Your Setup
To confirm that your OCI CLI is configured correctly and can communicate with Oracle Cloud, run a simple command like listing your compartments: If everything is set up correctly, this command will return a list of your compartments in JSON format.
oci iam compartment list
The OCI CLI command oci os ns get is used to retrieve the namespace for your Oracle Cloud Infrastructure Object Storage service. In Oracle Cloud Infrastructure, a namespace is a unique identifier that serves as the top-level container for all your Object Storage resources within your Oracle Cloud account.
What Does the Namespace Represent?
The namespace is essentially a partition in Oracle Cloud where your Object Storage resources (buckets and objects) are stored. Each Oracle Cloud account has one unique namespace that spans all regions and is tied to the tenancy. The namespace is automatically assigned to your account when it is created.
How is the Namespace Used?
- Bucket Identification: In Oracle Cloud Object Storage, every bucket name must be unique within a namespace but not across namespaces. Different tenants can have buckets with the same name, but each bucket name must be unique within a single tenant’s namespace.
- Resource Access: The namespace is part of the resource identifier (URI) for accessing objects stored in the Object Storage via APIs, SDKs, or CLI.
- Data Isolation: The namespace acts as a top-level isolation layer, ensuring that data storage structures are logically separated from those of other tenants.
Example Usage of oci os ns get
To use this command, you would typically run it from your terminal after configuring the OCI CLI with your credentials. The command returns the namespace associated with your tenancy. Here’s how you can execute it:
oci os ns get

The output will typically look something like this:

{
  "data": "an_example_namespace"
}
Here, an_example_namespace would be the namespace assigned to your tenancy. This value is crucial when constructing paths for API calls or managing storage resources programmatically or from the CLI.
Why is Knowing Your Namespace Important?
Knowing your namespace is essential for performing any operations related to object storage in OCI, including creating buckets, uploading objects, or setting up cross-region replication. It is often required in API endpoints and scripting scenarios where you must manage your cloud resources programmatically.
To list the buckets in a specific compartment within Oracle Cloud Infrastructure (OCI) Object Storage using the OCI CLI, you use the oci os bucket list command. This command requires you to specify the compartment ID where the buckets are located. Optionally, you can specify additional parameters like filtering by name, limiting the number of buckets returned, or specifying the region if your configuration file does not specify it.
Here’s how you can construct and run this command:
Basic Command Structure
oci os bucket list --compartment-id <COMPARTMENT_ID>
Replace <COMPARTMENT_ID> with the actual ID of the compartment for which you want to list the buckets.
oci os bucket list --compartment-id ocid1.compartment.oc1..exampleuniqueID
The final dissertation project as part of the MSc Artificial Intelligence program started in September 2022, this is the third month, and I thought to start sharing publically.
The major topic of my research is the healthcare sector, specifically maternal, specifically Maternal & Infant Health. I have created a details project proposal and submitted it to the university.
Here you will get the technical aspects of the work I am doing to complete my research, as it involves artificial intelligence and Machine learning on a huge dataset. I am into an interesting challenge, which almost daily enables me to learn something new.
Today onward, I will update here the progress and will also try to update the key aspects of the last 3 months work. let’s get started
A few tweets will give you a glimpse of the work over the last few weeks.
November 23, 2022: It began with the writing of this blog based on the difficulties of “preprocessing” datasets, I decided to revisit the CSV files and shorten the columns to the required only columns. Earlier, I did all this work after uploading it to the autonomous database.
Challenge: CSV file has approximately 3.6 million records, and MS excel can only support 1,048,576 rows. found some ideas to split it, and here is the method I have used to split the CSV file into multiple files and then work on it.
moved it into the desired folder, where my dataset files are available, and used the terminal window to execute the below command.
split -l 1000000 2021natdata.csvThis has created the files based on the data, so I have 4 files with naming conventions like xaa, xab, xac, xad.
now, these files need to be converted to CSV format, so I have used this statement, and all this found on google research.
for i in *;
do mv "$i" "$i.csv";
done
It gives me all four files in CSV format, and I have to do it for all my source dataset files.
How to convert large CSV files into multiple files.
Nov 24, 2022: Today’s task was to update the column name to some meaningful name so that it is easy to understand while just reading the column’s name.
for example, column name ‘dmar’ to ‘MaritalStatus’ and ‘rf_cesar’ to ‘PreviousCesarean’
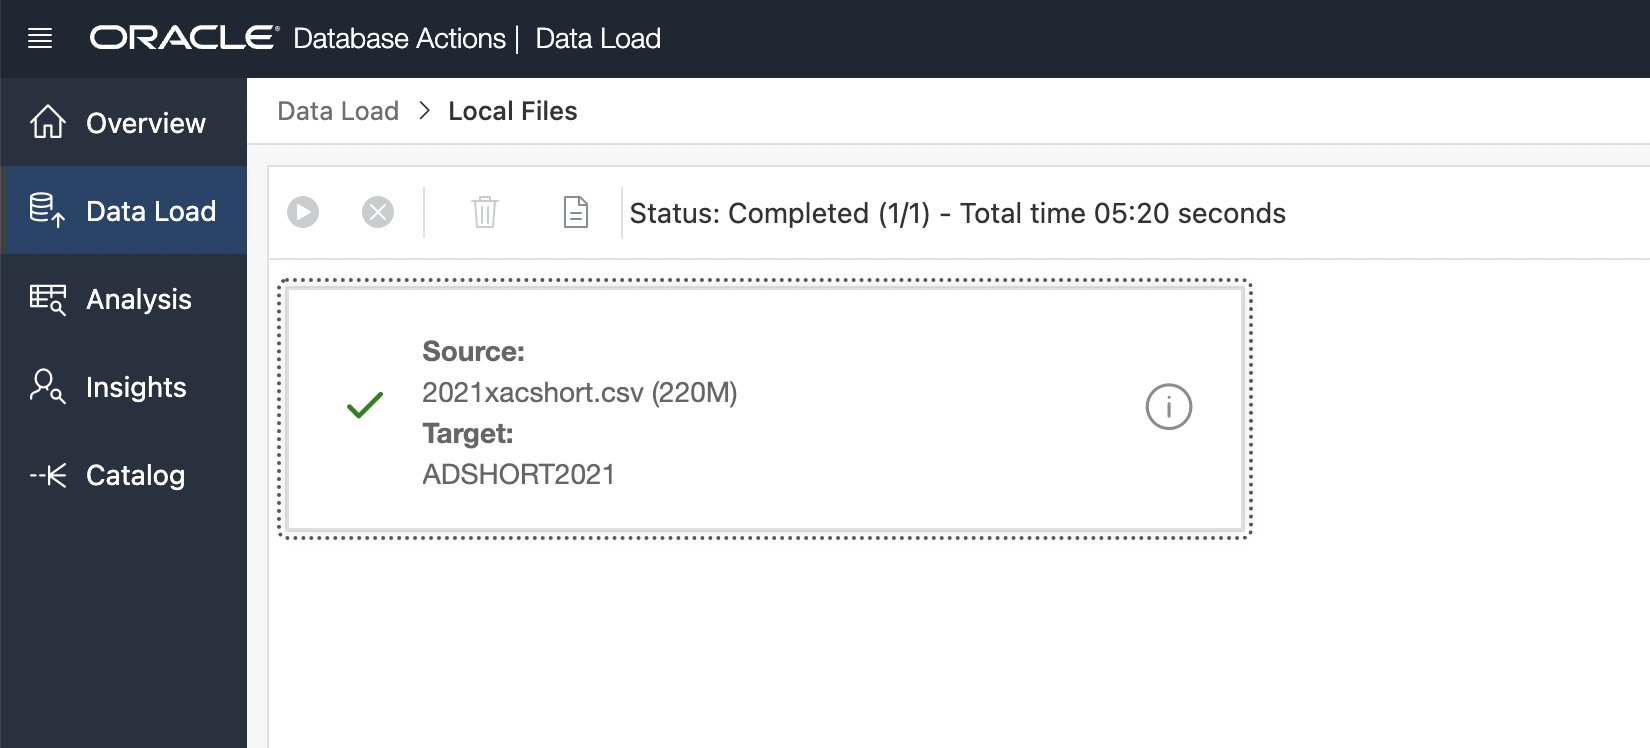
It was pretty challenging with the 16 different CSV files, and the average records were 1 million in each CSV file.
Loaded all CSVs data into Oracle Autonomous Datawarehouse in less than 30 minutes
I spent my weekend to debug this error while getting ready my dataset for data science project
— Kashif Manzoor (@kashifmanzoor) October 30, 2022
Finally, reached to a expert friend and it got solved in few minutes
10 hours spent on debugging help me to learnpic.twitter.com/2C7eWlo67L
15-March-2023
first of all my apology for not being able to update this, as the initial idea was to document the journey.
However with the extensive work required me to do for this dissertation, I was not able to cope with the pace and was not able to update this post.
I submitted my dissertation during the first week of March, and from now onward I will try to write separate blogs to help others to pursue their career dreams.
]]>They will help you build the
- Practical skills to solve problems
- Make strategic decisions.
- Eventually, lead your organization’s AI transformation journey
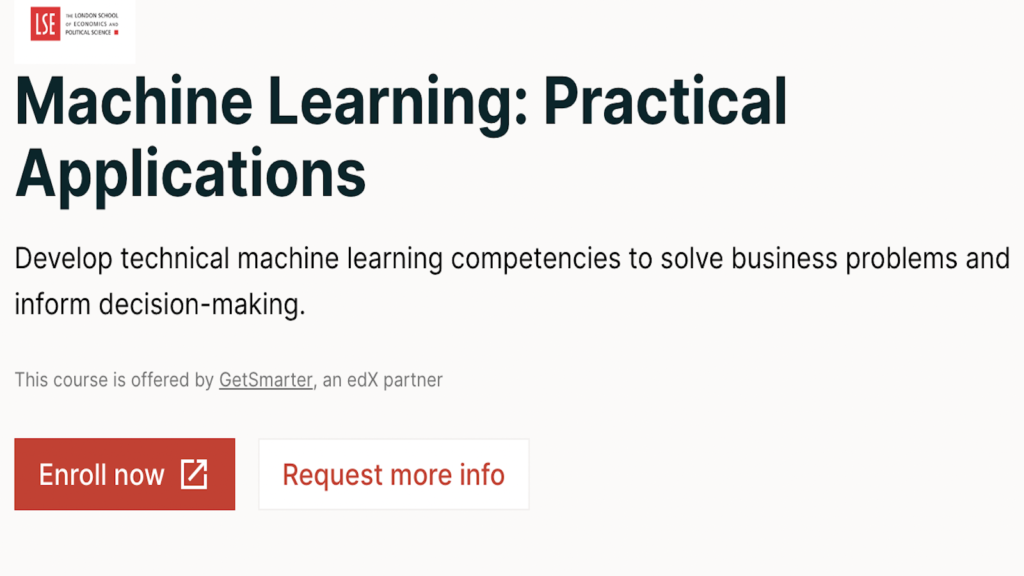
Machine Learning: Practical Applications
Module 1: Learning from data
Module 2: Principles of machine learning
Module 3: Regression
Module 4: Variable selection and shrinkage methods
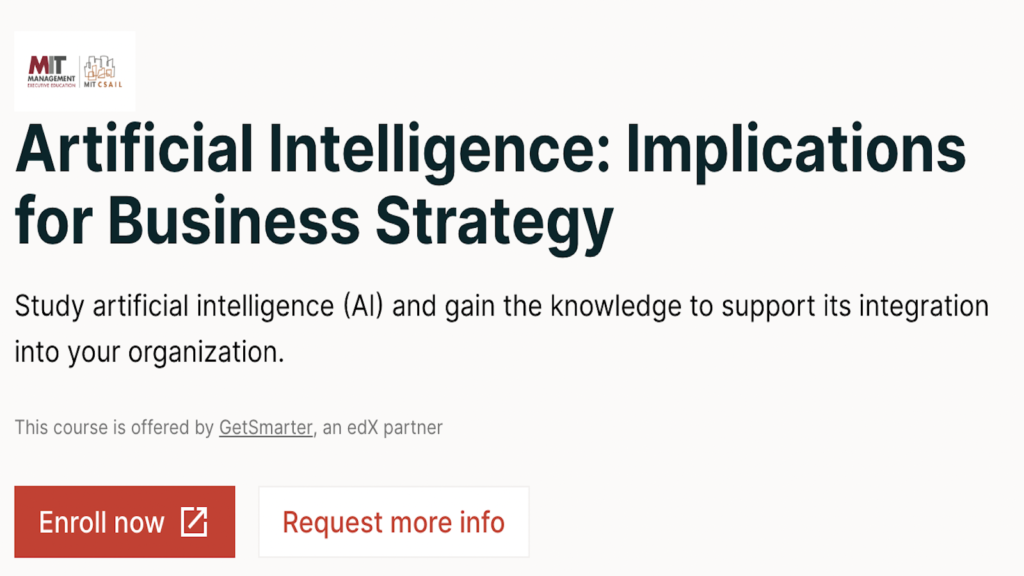
Artificial Intelligence: Implications for Business Strategy
Module 1: An introduction to artificial intelligence
Module 2: Machine learning in business
Module 3: Natural language processing in business
Module 4: Robotics in business
Oxford Artificial Intelligence Programme
Module 1: Artificial intelligence ecosystem
Module 2: AI and machine learning: Understanding the black box
Module 3: Understanding deep learning and neural networks
Module 4: Working with intelligent machines
Module 5: The ethics of artificial intelligence

Artificial Intelligence in Health Care
Module 1: AI and machine learning — applications and foundations
Module 2: Using AI for disease diagnosis and patient monitoring
Module 3: Natural language processing and data analytics in health care
Module 4: Interpretability in machine learning — Benefits and challenges
Module 5: Patient risk stratification and augmenting clinical workflows
Module 6: Taking an integrated approach to hospital management and optimization
Artificial Intelligence in Business:
Module 1: The business case for AI
Module 2: Algorithms: Learning and problem-solving
Module 3: AI-driven use cases in industries
Module 4: AI governance and ethics
MIT Machine Learning in Business
Module 1: Introduction to machine learning
Module 2: Implementing machine learning in a business
Module 3: Sensing the physical world
Module 4: Helping machines learn to use language

Whether you consider yourself computer smart or not, there’s a strong chance artificial intelligence (AI) has already impacted the way you interact with systems, organizations, and other people. You may transform those individual experiences into useful information and career advancement through these courses
]]>key notes:
by 2203, 75% of global 2000 IT organization adopt automated operation practices to transform their IT workforce to support
by 2022, to support autonomous operations, organization will increase their investment in digital engineering organizations, data governance, and operations technologies by 40%
COVID-19 introduced many New Task apps: organizations who added or will add new apps in 2020/2021 for COVID-related needs will add an average of 3.7 apps
2021: The Recovery begins: below is the situation:

Regional IT Spending Growth:

Technology Initiatives for 2021 and beyond:
- Creating digital among your workforce
- Designing for Social awareness
- Accelerating automation initiatives
IT investment across 3 control planes.
- workload control plane
- portfolio control plane
- ecosystem control plane
This is a significant trend in META as well. In our survey of HR execs in META, 27% say that they expect 30-49% of their staff to spend at least 50% of their time working from outside the office. suggests that 48% of enterprise organizations in the region are expecting up to 50% of their employees working remotely/from outside offices in the long term after the covid-19 crisis has past
- 41% of organizations have converted at least one of their business processes to support contactless experience
- by 2022, 45% of repetitive work tasks will be automated and/or augmented by using “digital co-workers” powered by AI, robotics, and RPA.
- 45% CIOs identified developing new business models and partnerships as a key priority
Guidance:
- Focus DX messaging on the 4 digital paradigms (contacts less economy, re-invention of business models, resilient supply chain, re-imagination of work
- Focus capabilities on the key pillars of the future enterprise (automation, cloud, digital infrastructure, intelligence/AI, Digitial Trust)
- Prepare for the new “digital ecosystem” (linear to ecosystem partner model, co-innovation with customers, p2p collaboration, IP-creation)

I like it, try out and enjoy coding with Python…
Colaboratory, or “Colab” for short, allows you to write and execute Python in your browser, with
- Zero configuration required
- Free access to GPUs
- Easy sharing
and if you want to install on your local computer to run Python code, here is the step by step process.
If you are new to the Python and want to learn the basics here is the video
Something new to know about Python, “Zen of Python” guiding principles to design the Python programming language.
Another amazing and very good video to consult for Jupyter notebooks
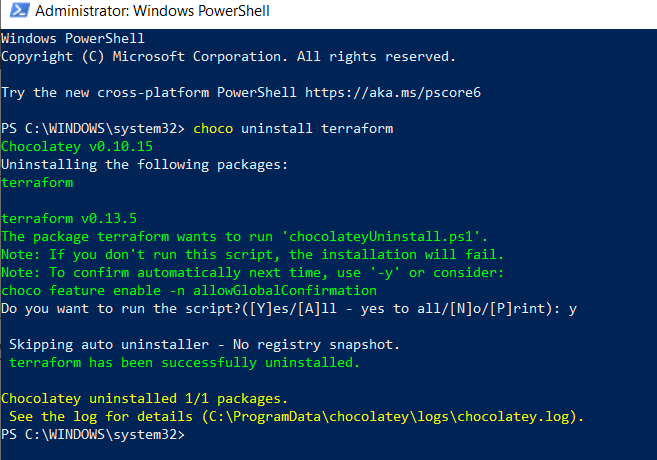
What I have realized that on my laptop I have already Terraform v0.13.5 installed. To use this method I need to have Terraform v0.11.x therefore I have to downgrade my Terraform version.
I have downloaded the ‘terraform_0.11.13_windows_amd64’ from the older version page and was stuck on how to uninstall the earlier version. Here is what I have found and documented for future reference:
How to uninstall Terraform
How do I downgrade my terraform version?
In the windows start, open PowerShell and run as an administrator.
Install Chocolatey if it is not already on the laptop. (this was already installed on my laptop, a week ago, while practicing something else)
Then run
choco uninstall terraform
Now I will install my required version, which was earlier downloaded from the Terraform site
‘terraform_0.11.13_windows_amd64’
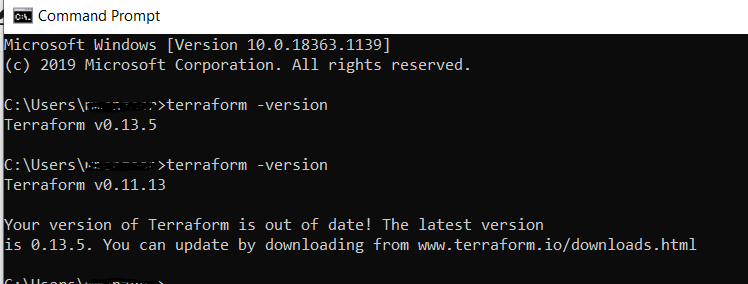
How to install Terraform on Windows
We need to just unzip it and then move the file to any place/drive on the laptop and then enter the file in the environment path
for example, I have moved it to my program files so here is the path file, and here is the link to This Stack Overflow article contains instructions for setting the PATH on Windows.
Go to Control Panel -> System -> System settings -> Environment Variables.
Scroll down in system variables until you find PATH.
Click edit and change accordingly.
BE SURE to include a semicolon at the end of the previous as that is the delimiter, i.e. c:\path;c:\path2
Launch a new console for the settings to take effect.
you can see in this below picture my earlier version and after going through the above steps the new version (which is an older version)
Update: 4-Jan-2021: I have downloaded the new version (which I want to have) and just replaced the exe file with the new one and it worked  without going through of un-installing process. just sharing with you another behavior that I have noticed.
Overview of OCI Architecture to deploy Hyperion on Cloud
How to set up the Oracle OCI infrastructure to deploy Oracle Hyperion – Enterprise Performance Management on Cloud. This provides step by step instructions.
GitHub resources how to deploy on Oracle Cloud Infrastructure
Latest info as a blog
The next action item on this topic is, I will do it myself and will post the progress.
I am continuing my journey of how to deploy Oracle Hyperion on OCI and just started following some basic steps as outlined in this reference link Set up the infrastructure to deploy Oracle Enterprise Performance Management. First part of this:
How to uninstall Terraform and install newer version on Windows
Update: 11-01-2021 here is the video on how to Deploy Oracle Hyperion – Enterprise Performance Management on Oracle Cloud Infrastructure with Terraform scripts.
It is a try to execute as per the mentioned docs to learn how to deploy Oracle Hyperion on OCI; there may be some errors and missing info in the video. If you want to try, refer to the source docs, and you can complement this video to see in action scripts running.
- charts of accounts,
- ledgers,
- business units,
- legal entities
Enterprise structures are dependent on number of areas, for example:
- Industry
- Business unit requirements for autonomy
- Business and accounting policies
- Business functions performed by business units and optionally, centralized in shared service centers
- Locations of facilities
There are 3 primary resources available for you to learn the basics and become an expert on the topic of how to define Fusion Enterprise Structures for your next implementation:
Very detailed document available on My Oracle Support:
Cloud ERP Enterprise Structures White Paper (Doc ID 2415848.1)
Mapping Your Business’ Organization Enterprise Structures:
Comprehensive document available on Defining Enterprise Structures (Learn.oracle.com)
Standard documentation on Oracle Cloud ERP:
Available in implementing Oracle Cloud ERP Applications: Enterprise Structures
Reference: Oracle Cloud Applications – SaaS
]]>